
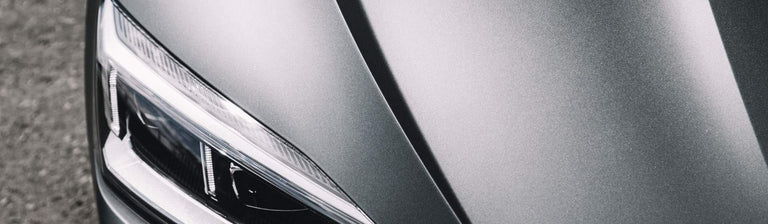
HOW TO VINYL WRAP A CAR AND CARE FOR IT – THE FULL DIY GUIDE
Given that over half of all cars are monochromatic shades, it’s no surprise you’re interested in a new look, a new color or finish or something more artistic. For years, the solution was a custom paint job, but the mid-1990s marked a revolution in vehicle customization: vehicle vinyl wrap.
WHAT IS VINYL CAR WRAP?
Since the 1950s, vinyl was used for custom lettering, logos, and decals, but full car wraps didn’t catch on. Then, in 1993, a mundane, yet revolutionary, idea came along: Why not vinyl wrap a car in its entirety? Germany mandated all taxis be colored beige, but nowhere stipulated paint. Kay Premium Marking Films saved the day with a beige vinyl, making practically any vehicle regulation-compliant in just a few hours.
Vinyl car wrap is a blend of polyvinylchloride (PVC) polymer, from which the word “vinyl” comes from, with various additives to make it flexible, resistant to ultraviolet light, and add color. These ingredients are blended, cast onto moving sheets, then baked and cured.

VINYL TODAY
The resulting vinyl sheet can be as thin as 2 mil, just two thousandths of an inch thick. After adhesive application, vinyl car wrap sheeting may be cut into smaller rolls, for individual consumers, or sent to printers, for custom graphics as simple or as complex as you can imagine.
Put most simply, vinyl car wrap is adhesive-backed plastic sheeting, but oh what we can do with a roll of plastic today! In the last few years, we’ve come a long way from solid colors, and innovators in the car wrap industry have developed metallic, reflective, matte, gloss, pearlescent, color-changing, even factory-matching and Pantone colors, not to mention beautiful, stunning, and complex patterns and combinations.

PROS AND CONS - VINYL VS PAINT
If you’re considering changing the look of your vehicle with a paint job or a vinyl wrap, each has its advantages. A paint job used to be the de facto standard – after all, it’s worked for over a century. A paint job requires a professional’s touch, not to mention professional equipment, to get a showroom finish, which drives up the cost and slows things down. Multiple or special colors, such as pearlescent or metallic finishes, further increases time and costs. Graphics or custom designs require another specialist’s touch, typically hand finished.
Such basic or custom paint jobs last the life of the vehicle, possibly decades. On the one hand, such permanence may be desirable, but outlandish combinations can be polarizing. For a show car with a pedigree, custom paint can dramatically increase its value. On the other hand, custom paint can significantly reduce its desirability – not everyone wants a pink skulls daily driver.

VINYL CAR WRAP TECHNOLOGY
Thanks to advances in vinyl car wrap technology, it’s no longer prohibitively expensive to completely change the look of your car, particularly if you plan on doing it yourself. Going the professional route, vinyl car wrapping can cost as much as a paint job, but patience and a steady hand can make even a full car wrap go smoothly for a do-it-yourselfer. In fact, the tools required are easily accessible and require no special licenses, training, or experience. Basic color changes, even multiple colors, don’t add much to the overall cost of the project, but custom graphics, prints, or finishes may increase the cost of materials. Still, the finished product can be particularly stunning.
The very nature of vinyl car wrap lends itself to temporary applications. With proper care, a quality car wrap can last five to seven years, perhaps ten years. For permanence, this may be undesirable, but temporary might be perfect for certain drivers. Maybe you’ll want to change the look again in a couple years or you want to sell the car – little old ladies may not be keen on those oh-so-metal graphics. In either case, removing vinyl car wrap only requires a couple basic tools and supplies, and doesn’t affect the original finish in the least. In fact, the original paint job will be better than one of similar vintage, because vinyl car wrap blocks paint-damaging ultraviolet light, maintaining the resale value of your vehicle.
THE DIY FULL CAR VINYL WRAP GUIDE
If you ever tried to apply vinyl lettering or graphics to your car in the past, you likely found the job difficult, even if you prepared the surface and yourself well. Tears, bubbles, stretch marks, and wrinkles may have convinced you a full vinyl car wrap to be firmly in the realm of professional installation. A lot has changed: more resilient vinyl, better adhesives, and air-release technology. Even a do-it-yourselfer can get great results. Ready to get started?
PREPARING TO WRAP YOUR CAR
1. Consider your canvas, the surface you’re wrapping. Is the body and paint job smooth? Minor scratches don’t pose a problem, but chips, dents, gouges, and rust can cause problems with vinyl wrap. If the wrap sticks to the defect, it’ll greatly increase its visibility. If the wrap doesn’t stick to the defect, it’ll bubble or tear, ruining the wrap job. Take care of these imperfections before wrapping your car.
2. Choose a location. You don’t need a medical research cleanroom, but a clean and controlled environment will keep dust out from under the wrap. As with paint and body defects, dust, debris, and bugs will mar your finish. Sweep, vacuum, and mop if you must, and close the doors to achieve a great vinyl wrap project.

3. Work on a warm day. Vinyl and vinyl adhesive are temperature sensitive. The vehicle and wrap should be at the same temperature, around 68 °F (20 °C). Colder, and the vinyl become brittle and could tear. Hotter, and the adhesive may activate too aggressively, making it difficult to install smoothly. Use a non-contact infrared thermometer to monitor things. It might be a good idea to plan the job for a different time of day or let everything acclimate for a few hours before starting.
4. Gather your tools, supplies, and materials. The average car requires a 25-foot roll of 60-inch wide vinyl wrap. Narrower rolls are available, but this will require making a seam, quite the trick for a first-timer. You’ll also need grease and wax remover, a general cleaner, 70- or 90-percent isopropyl alcohol, lint-free cloths or towels, squeegee, utility knife, cutting tape, heat gun, infrared thermometer, and cotton wrap gloves. A clean worktable keeps everything off the floor and reduces the chance of picking up dust. This is a great project with a buddy, for holding larger sections of vinyl wrap and for moral support.

SURFACE PREPARATION & PLANNING
5. Clean your car. Non-wax car wash products, like Turtle Wax MAX Power Wash or Turtle Wax Snow Foam leave a clean surface to which vinyl wrap will readily bond. Then, clean the entire surface with isopropyl alcohol and lint-free cloths.
6. Remove obstacles from the wrap surface. Yes, you can wrap around an emblem, mirror, door handle, antenna, or headlight, but this greatly increases the difficulty and time required to get a good vinyl wrap finish. Save yourself a bottle of ibuprofen by removing obstacles. Go over the surrounding areas with alcohol once more to remove fingerprints or dust.
7. Measure each section you plan on wrapping, adding a few inches for handling. Sketch a diagram of your car’s body panels and write down these measurements for later. Measure twice, add a little, and cut once. Remember, you can’t add material once you’ve cut it off! If a panel is close to or wider than your widest vehicle wrap, you’ll need to make a seam. Don’t try to wrap a 60-inch hood with 60-inch wrap – you’ll come up short, guaranteed.
LAYING YOUR FIRST SHEETS OF VINYL
8. If this is your first vehicle wrap project, starting with smaller and flatter sections will help you build confidence and momentum before tackling a wide roof or sculpted hood. Use your sketch and measurements to determine how much material to cut, using a utility knife.
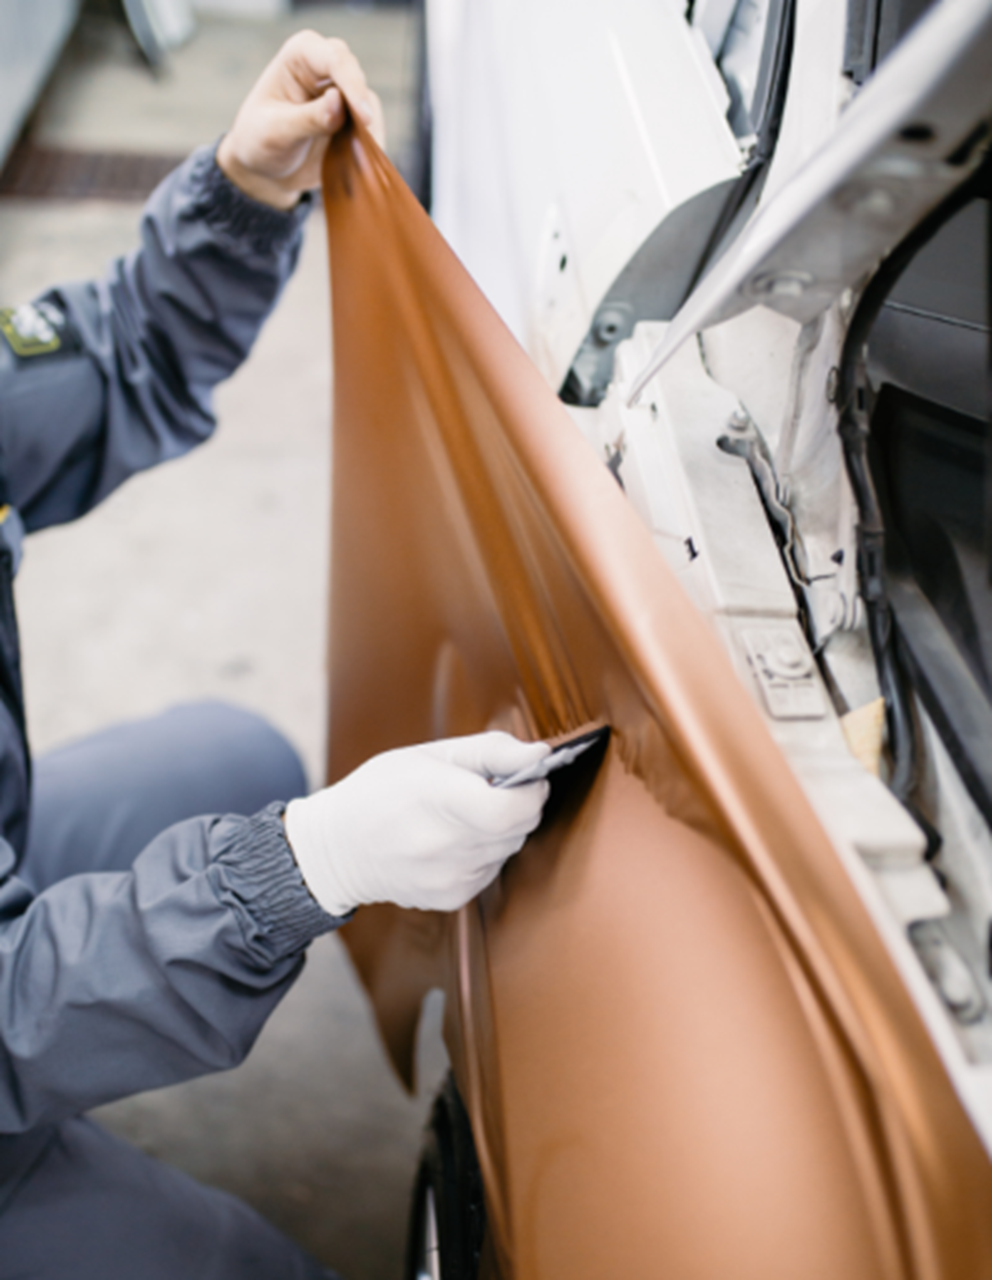
9. Holding the vinyl in the air – you and your buddy wearing cotton gloves – remove the backing paper while keeping even tension on the wrap. This helps reduce wrinkles and creases. Carefully lay the vinyl wrap over the panel, leaving extra material around the edges to manipulate it.
10. Gently press the vinyl into the center of the panel and keep tension on the rest of the sheet. Using the squeegee, start at the center and work in overlapping strokes toward the edges of the panel. This will force air out and temporarily adhere the vinyl to the panel.

PRESSING OUT AIR & WRINKLES
11. Curved surfaces can be especially challenging, forcing a two-dimensional object to conform to a three-dimensional surface. As you work, if you note wrinkles or bubbles, gently peel back the vinyl and apply heat, no more than 120 °F (80 °C), and tension to stretch it into place. Use the squeegee again to work back out from the center to the edges. When wrapping other items, like mirrors, wheels, or interior panels, the same challenges apply. Be patient to get the stretch right when fitting to curved surfaces.
12. Making seams can also be a challenge, but there are a few ways to deal with it. The easiest way is to simply overlap one piece of vinyl over another, which requires careful alignment but no cutting. Kevlar cutting tape is a great invention that leaves perfect seams without a blade. Snap knives are the last alternative, a sharp edge to prevent snagging, and be gentle to prevent damage to the underlying paint.

EDGING AND FINISHING
13. A great finish starts with wrapping the edges of the panels. Use the utility knife to trim excess material to within a quarter-inch (2-3 mm) of the edge – counter-intuitively, greater margins are worse. Use the heat gun to evenly heat the edges of the panel and vinyl wrap to at least 212 °F (100 °C), activating the adhesive. Use the thermometer to verify even heating. Use the squeegee and your fingers to firmly seal the edge of the vinyl to the panel. If heating the vinyl to get it around a sharp curve, be sure the vinyl cools before trimming.
14. Once corners and edges are sealed and set, use the heat gun on the rest of the panel or piece, at least 212 °F. This activates the adhesive on the rest of the vinyl for a long-term bond. Use your hands and squeegee to firmly bond the vinyl wrap to the surface. Bubbles may appear at this stage, but they can be popped safely with a pin or utility blade and pressed down with your fingers. Again, use the thermometer to verify even heating. Wait at least 12 hours for the adhesive to fully set.

HOW TO CLEAN VINYL WRAP
Congratulations on your new vinyl car wrap! Taking care of it will help it last a long time. Depending on the type and location, a vinyl car wrap can last up to ten years. There are three key steps to keeping your vinyl wrap in great condition.
CLEAN & SHINE
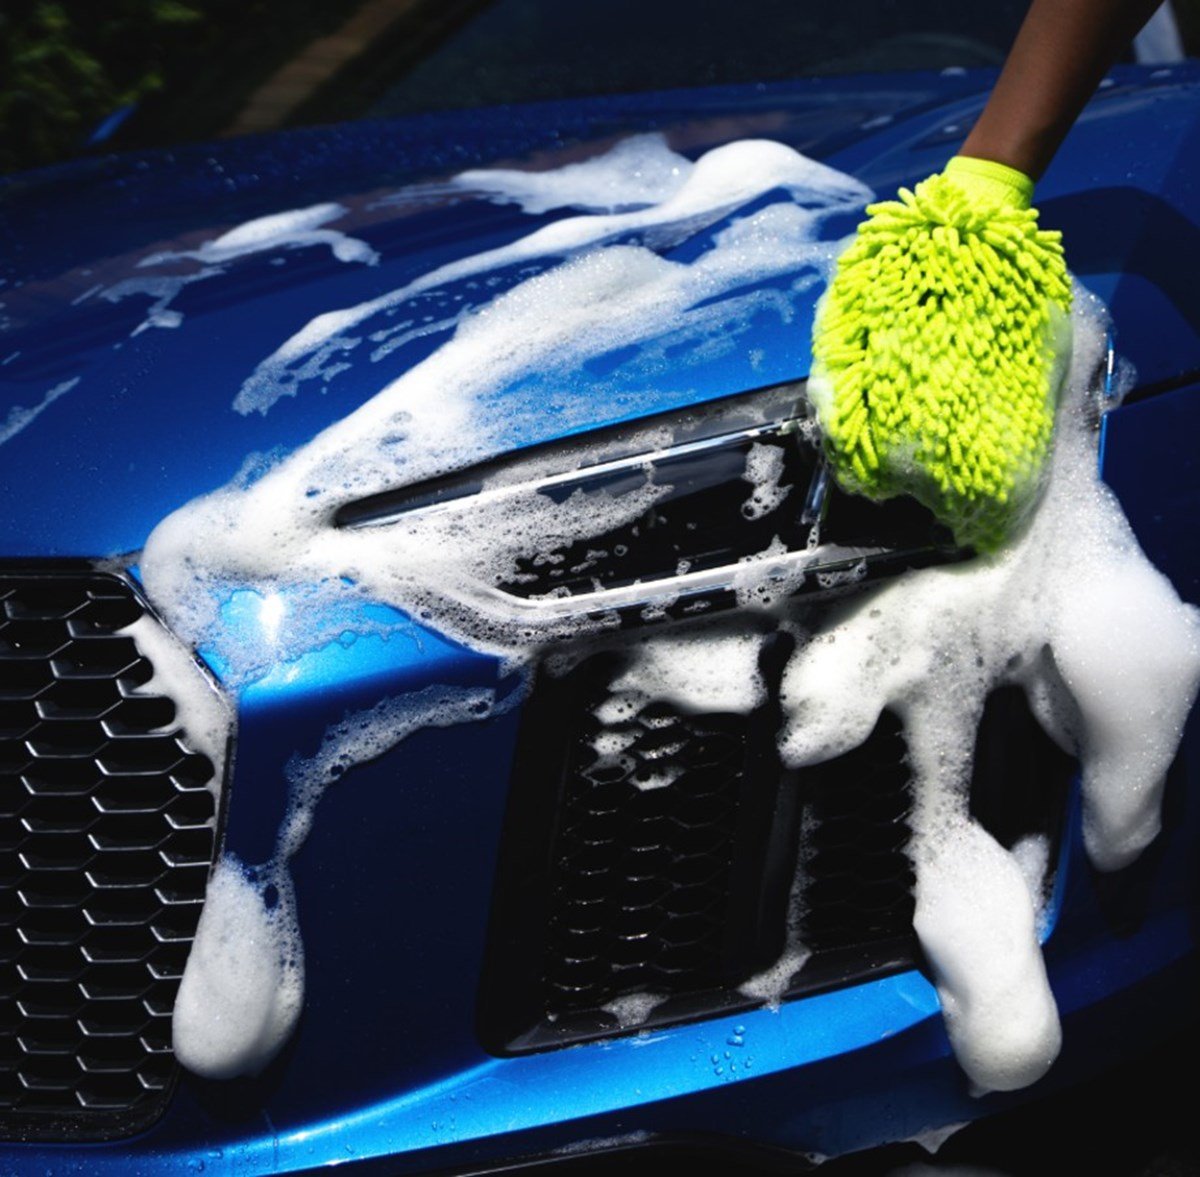
1. Wash often to prevent buildup of excess dirt and grime. Tough stains might require spot application of isopropyl alcohol. Turtle Wax MAX Power Wash and Turtle Wax Snow Foam car washes are excellent choices, protecting glossy vinyl finishes. They also prevent hazing of matte vinyl finishes.
2. Gentle cleaning is best. Hand washing and drying is the recommended method to keep vinyl clean. Use a silicone squeegee to remove excess water before drying with microfiber towels. Brush car washes are not recommended, as these can scratch and pull at the edges of your vinyl wrap. Touchless or brushless car washes are good choices, and pressure washers can be used on gentle settings; under 2,000 psi, under 180 °F (80 °C), >40° spray tip, at least 12 inches (30 cm) from the surface, and at right angles to the surface.
3. For a showroom shine, Turtle Wax ICE Spray Wax or Clean and Shine are safe on vinyl surfaces and won’t fade or haze. Polish and wax products can lead to hazing and mar textured vinyl appearances.

HOW TO REMOVE VINYL FROM YOUR CAR
Eventually, no matter how you care for it, your vinyl car wrap will degrade. Some wraps last over a decade, while others only a few years. Fortunately, removing vinyl car wrap is an easy task. All you need is a heat gun and adhesive remover.
HOW TO REMOVE VINYL FROM YOUR CAR
1. Use your fingernail or plastic scraper to pull the wrap from the edges of the entire panel. It’s going to look gnarly, but it’ll all be gone in a few minutes.
2. Use the heat gun to evenly heat the surface of the wrap to about 120 °F (50 °C). This will loosen the adhesive so you can pull it off. Use a non-contact infrared thermometer to confirm you aren’t overheating, which can lead to excessive adhesive residue left on the surface.
3. Pull the wrap away from the edges at a steep angle, pulling the wrap back on itself at 15 to 20 degrees. When the wrap gets hard to pull, reheat and start pulling again.
4. Finally, use Turtle Wax Label & Sticker Remover or Bug & Tar Remover to remove any adhesive residue from the surface of the panel.

VINYL WRAP VEHICLE FAQ
Can I vinyl wrap my car myself?
- Absolutely! Vinyl car wrap can dramatically change the look of your vehicle, but it only requires a few basic tools, a clean work area, and a patient approach.
Can I put my wrapped car through a car wash?
- Hand washing is best for vinyl wraps, but brushless or touchless car washes can be just as safe. You can even use a pressure washer if you’re gentle.
Will car wrap damage my car’s paint?
- Actually, car wrap can protect your paint because it blocks damaging ultraviolet light. When you remove it, the original finish will be intact.
How long does vinyl wrap last?
- Depending on the quality of the wrap, type of vinyl wrap, care taken during installing, care after installation, and environmental factors, car wraps can last from three to ten years.
Is there anything you can’t wrap?
- Vinyl car wrap sticks best to smooth factory paints and smooth rigid plastic surfaces. It won’t bond well, if at all, to poor paint jobs, orange peel, deep scratches, gouges, rust, chipped paint, flaking paint, textured surfaces, rubber, ABS plastics, porous or spongy surfaces.
Related Articles
Featured Products


WANT MORE TURTLE WAX?
Subscribe for your newsletter and the rewards will be in your inbox before you even get there
Latest
News, events and insights from Turtle Wax® worldwide
Offers
Exclusive offers and discounts on Turtle Wax® products
Rewards
Regular treats and surprises for all subscribers