Restoring Your Car's Interior Plastic And Trim

3 TIPS TO RESTORING YOUR CAR'S INTERIOR PLASTIC AND TRIM

In this article you will learn:


  • How to restore your car’s worn plastic and rubber trim

  • Which product and tools you need to restore plastic trim

  • The best tips for achieving professional-grade results

Your trim is exposed to numerous harsh, environmental factors that can cause it to crack and fade over time. Once the damage has been done, it can be difficult to reverse, causing your vehicle to look worn and dated. Luckily, with the right products and tools, you can easily restore your plastic trim while preventing further damage to your delicate interior. Here are 3 helpful tips on how to restore your vehicle's trim like the pros!

What You Need to Know

Weather conditions cause most of the damage to your rubber or plastic trim. Extreme heat and freezing cold temperatures can both stress plastic and rubber materials, causing them to stiffen, dry out and eventually, crack open.

Black trim is especially vulnerable to extreme weather conditions because it absorbs more of the sun’s harmful, UV rays, causing it to fade and become discolored much quicker than gray or tan-colored trim.

In addition to the extreme temperatures, the chemicals and mineral deposits found in acid rain can cause your trim to become dull and oxidized. These deposits also create a chain reaction when exposed to the sun that dries out your plastic and rubber surfaces, causing them to yellow and stress fracture.

To restore faded interior and exterior plastic, you’ll need to use a product that not only brings back its original color and elasticity, but also protects it from further damage from the rain, heat and snow. That’s why most trim restorer products, like Turtle Wax Trim Restorer, are infused with powerful UV inhibitors that protect rubber and plastic surfaces from exposure to the sun, preventing cracks and fading before they occur. Trim Restorer also contains powerful softening and conditioning agents to keep your plastic and rubber trim soft and hydrated. You can also use this plastic restorer on your bumpers, window seals and siding to prolong the showroom look and feel of your car interior.

Now that you know what causes your trim to crack and fade and which products to use to solve this issue, here are three important things to keep in mind while restoring your car’s plastic or rubber trim!

Tip #1: Always Clean Before You Restore

Lots of people purchase a trim restorer product and begin applying the solution to the surface of their vehicle before removing dirt, stains and other abrasive contaminants. Not only does this seal the filth into your finish, but you also risk scratching your car trim from rubbing loose soils and grime into your delicate plastics.

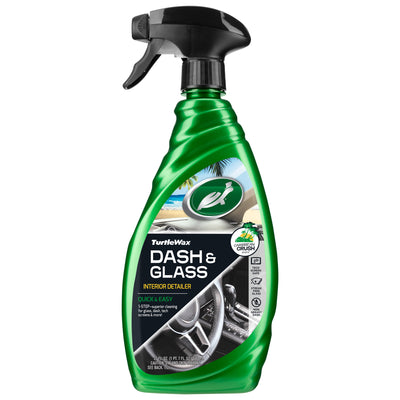
Always clean your trim thoroughly before applying your trim restorer and protectant, even if your car looks clean at first glance! Many sharp contaminants are invisible to the naked eye, but they can still be detrimental to your rubber and plastic interior. We recommend that you use an interior detailer like Turtle Wax Dash & Glass, or a multipurpose cleaner and disinfectant like Multipurpose Cleaner & Disinfectant, to quickly spray and wipe down your car before you restore.

As you clean, be careful not to overlook the more intricate spaces inside your vehicle, such as your air vents and the cracks and crevices of your dashboard. You may need to use a cotton swab or a small detailing brush to remove stains and soil buildup from these hard-to-reach locations before treating your plastic or rubber trim.

always clean before you restore

Tip #2: Make Sure You’re Using The Proper Tools

To apply your trim restorer and protectant, all you’ll need is a dedicated microfiber towel to massage product into your freshly cleaned trim. We recommend having an edgeless detailing towel with a 300 GSM microfiber blend to safely encapsulate dirt and soils while going easy on your soft, interior plastics.

It’s important to keep this towel separate from the detailing tools that you use on other areas of your car, such as your wheels, tires, exterior paint, etc., to prevent the cross-contamination of product and more abrasive soils that easily destroy your plastic finish.

make sure you’re using the proper tools

Tip #3: Protect and Lubricate Your Rubber Seals!

Don’t forget—the rubber seals under your trunk and hood and between your car doors are all part of your trim! If these surfaces begin to crack, rainwater will start to seep into the trunk of your car, under the hood, and even inside the vehicle as you drive, which can create serious complications down the line.

Make sure to apply protectant to these areas to keep them soft and lubricated. Taking the time to treat your rubber seals will keep your trunk and car doors from jamming or getting stuck after years of repeated use while helping your vehicle stay in peak working condition!

protect and lubricate your rubber seals

WANT MORE TURTLE WAX?

Subscribe for your newsletter and the rewards will be in your inbox before you even get there

Latest

News, events and insights from Turtle Wax® worldwide

Offers

Exclusive offers and discounts on Turtle Wax® products

Rewards

Regular treats and surprises for all subscribers

Thanks! You should receive a confirmation email shortly.