How To Clean & Restore Taillights

HOW TO CLEAN & RESTORE TAIL LIGHTS

In this article you will learn:


  • What causes oxidation or discoloration to your taillight lenses

  • How to restore damaged or oxidized taillights to like-new condition

  • How to protect your taillights from future damage or oxidation

Clear headlights are essential for everyday driving, but most people forget about their second pair of lenses. Taillights are made of the same, polycarbonate material as headlights, meaning they’re just as vulnerable to the sun’s harsh, UV rays. After months of exposure, they can become foggy and discolored, contributing to a used car’s worn, aged look.

It’s important to clean and restore your taillights with a car light cleaner every 6-12 months to keep your lenses looking smooth and crystal-clear. The sooner you correct damaged or oxidized taillights, the easier they are to maintain in the long run. So, grab your lens restoration kit and let’s get started!

What you need to know

Most of the damage you see on your car lenses, such as oxidation and discoloration, is caused by long-term exposure to the sun. Your taillights come with a base coat to prevent this sort of damage, but, over time, this protective coating wears off, and the sun’s powerful UV rays start to degrade the plastic of your lenses.

To restore your taillights, you’ll need to get rid of this oxidized layer to bring back the original clarity of your lenses. Essentially, you’re stripping away the outer layer of your taillights to expose the smooth, clear plastic underneath.

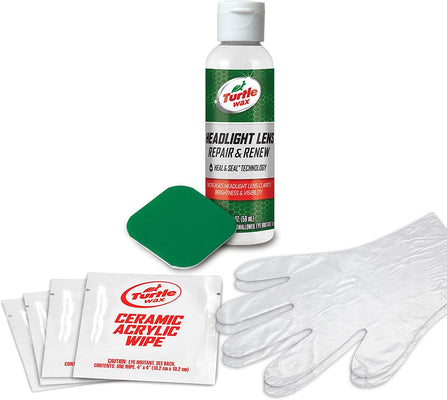
The easiest way to restore your taillights is with a lens restoration kit. Our Speed Lens Restorer Kit has everything you need to correct light scratches, sun damage and oxidation to your taillights at home, with no drills or complicated machinery required. Along with this kit, all you need is soap, water and some microfiber cloths to bring back the showroom look of your lenses in 15 minutes or less!

Wash and dry your taillights

Start by using warm, soapy water and a microfiber cloth to remove any loose dirt and soils from your taillights. You should always clean your lenses before you restore them to avoid rubbing dirt and other abrasive contaminants into your finish. Once you’ve removed all the dirt from your taillights, rinse them thoroughly with a hose and pat them dry with a fresh, microfiber towel.

wash and dry your taillights

Apply the lens clarifying compound

Apply a quarter-sized drop of the lens clarifying compound in your kit to a clean microfiber cloth and buff it into the surface of your taillights, one lens at a time. This clarifying compound will remove any light surface oxidation on your taillights. If your taillights return to a glossy finish, then you’ve successfully removed all the oxidation from your lenses! However, if there are still signs of oxidation on your taillights, you’ll need to use one of the sanding pads in your restoration kit to correct the more severe damage to your lenses.

apply the lens clarifying compound

Switch to the heavy-grit sanding pad

Find the side labeled “number one” on your sanding pad. You’ll notice that this surface is much rougher to the touch because it's designed to remove heavier scratches and oxidation from your lenses. Apply your sanding pad to one taillight at a time for about 20 seconds, using water as a lubricant. Work using back-and-forth motions, concentrating on the damaged areas of your lenses until all the oxidation and discoloration has been removed.

switch to the heavy-grit sanding pad

Flip over your sanding pad

Turn over your sanding pad to the side labeled “number two” to smooth any scratches or imperfections left behind by the first side. Continue to use water as a lubricating agent and apply the pad to your one lens at a time, working in the opposite direction to create a uniform, even finish.

Give your lenses a final polish

Once you’re satisfied with your taillight restoration, it’s time to reapply the clarifying compound to bring back the original shine and gloss of your lenses. Use a quarter-size drop of the compound to buff your taillights to a crystal clear, sparkling finish. Then, turn over your cloth to a fresh side to wipe away any excess compound.

Protect your taillights with the lens sealant wipes

You’re almost done! But before you throw in the towel, there’s just one last step. Now that your taillights are restored, you need to apply a fresh protective coating to your lenses to keep them looking smooth and glossy for months to come, and to protect them from future oxidation.

There are two types of protective sealants in your Speed Lens Restorer Kit. Start with the acrylic base coat wipe, applying an even layer on one taillight at a time. Wait a few minutes to allow both of your lenses to cure. If you’re experiencing humid weather, you may need to wait a couple more minutes for your lenses to cure completely, as the extra moisture in the air could slow down the curing process.

Next, apply the ceramic sealant wipe to each lens in a smooth, even layer. This durable, silicone sealant will last a lot longer on your lenses and give your taillights an extra pop of gloss to add the finishing touch to your flawless finish. Give the sealant 3-5 minutes to air dry, and you’re done!

Be sure to repeat this process once or twice a year to keep your taillights looking shiny and new. When it comes to maintaining that showroom look, sparkling clean taillights make all the difference!

lens sealant wipes

WANT MORE TURTLE WAX?

Subscribe for your newsletter and the rewards will be in your inbox before you even get there

Latest

News, events and insights from Turtle Wax® worldwide

Offers

Exclusive offers and discounts on Turtle Wax® products

Rewards

Regular treats and surprises for all subscribers

Thanks! You should receive a confirmation email shortly.