hero

HOW TO DETAIL A CAR COMPLETELY

Have you been through a car wash or auto detail lately? Plenty of shops offer car wash, exterior detailing, or interior detailing, but why is car detailing so much more time-consuming than a car wash? The truth is, auto detailing is a bit more complicated than a car wash, but with the right Turtle Wax products, you can learn how to detail a car at home. Truly, there is a certain satisfaction that comes with DIY auto detailing, so let’s get started!

WHAT IS CAR DETAILING?

It can be confusing when people use the terms “car detailing” and “car washing” interchangeably, but there are major differences between the two. There are similarities between auto detailing and car washing, but auto detailing goes much deeper than simply cleaning your car inside and out.

When considering auto detailing, one starts with car washing and vacuuming. Then, using more specialized tools and car detailing supplies, auto detailers give your car a much deeper cleaning. This might even include removing parts of the car to get into cracks and crevices that have never seen the light of day.

Finally, once a highly detailed cleaning has been achieved, car detailers will apply specialized products to enhance your car’s appearance and protect it from future dirt and damage. As a result, a detailed car can look and smell like a new car, even if it’s aged over a decade!

auto detailing guide - turtle wax - hose down vehicle

HOW TO DETAIL A CAR AT HOME

To detail a car at home, you’ll need several car-specific tools and car detailing supplies, as well as a few things you might have at home. The first time, especially, you might need to set aside a few hours. If your car is only a couple years old and has been regularly washed and vacuumed, a full car detail might only take an hour or two. On the other hand, if your car is older and hasn’t seen a vacuum in years, auto detailing the first time could take a whole day.

WHY SHOULD I DETAIL MY CAR AT HOME?

At this point, you might think, “Why bother auto detailing myself when I can pay an auto detailer to do it for me?” It might be tempting if your car is going to need a whole day of auto detailing, and the initial investment might seem daunting, but it pays for itself by the second time you detail your car. Also, consider these other benefits of car detailing at home.

  • You’ll save money because you provide the labor. You don’t have to buy all these supplies every single time, just whatever you run out of.
  • You’ll save time in the long run because a clean car is easier to keep clean, even unintended spills and pet accidents.
  • You’ll gain a new appreciation for what it takes to keep a clean car.
  • Finally, your car will last longer. Auto detailing is just as much about long-term protection from the elements as it is looking great and smelling clean.

Professional auto detailing and DIY car detailing follow pretty much the same steps for a showroom finish, though the tools and supplies may vary. Interior detailing will require opening doors and getting in and out of the car often, which will likely dirty the outside of the car. Therefore, many auto detailers start by detailing the interior of the car. When, once the inside is clean and protected, they close the doors and windows and focus on exterior detailing.

auto detailing guide - turtle wax - jet wash vehicle

INTERIOR DETAILING PRODUCTS AND STEPS

Now, let’s go through some of the steps, useful car detailing tools (bold), and car cleaning products (underlined) you’ll need to get professional-looking auto detailing at home. We’ve even included tips from car detailing professionals (italics).

  • Start by taking out the trash. A small trash bag can come in handy here, as well as latex or nitrile gloves. Pick up old napkins, food wrappers, car parts, loose coins, and anything else that’s too big for the vacuum cleaner to pick up. Don’t forget to check the glove box, console boxes, door cubbies, cup holders, and change bins.
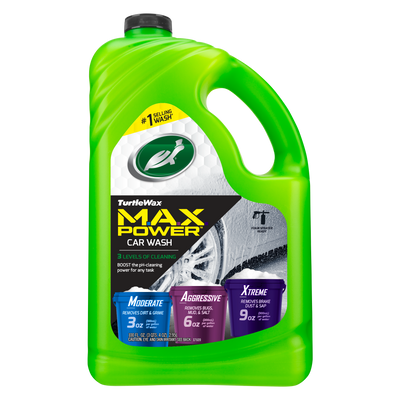
  • Remove all floor mats and clean these separately. Use a stiff brush and car wash soap, like Turtle Wax MAX Power Car Wash, to clean rubber mats. Upholstery cleaner, such as Turtle Wax POWER OUT! Carpet & Mats Cleaner, and a stiff brush or steam cleaner can be used on carpeted floor mats. Once cleaned, hang the mats to dry.

Pro Tip: Use a wet-dry vacuum to suck out as much water from carpeted mats to accelerate drying.

auto detailing guide - turtle wax - interior detailing microfiber cloth

REMOVE UNPLEASANT ODORS

  • Use a dry microfiber duster to dust all interior surfaces, starting from the top down. The dash, instrument cluster, center console, and door panels are a good start, but there’s more. Don’t forget the headliner, interior panels, rear deck, windows, and seats. Use compressed air, from an air compressor or electronics duster, to blow dust out of small crevices. 
    • Pro Tip: Use a soft long-bristle artist’s paintbrush or makeup brush to get into small crevices, such as air conditioning vents. A spritz of furniture polish on the brush will improve dust removal.
  • At this point, take a break and think about how your car smells. If you notice heavy food or drink smells or musty smells, treat it with Turtle Wax Power Out! Odor-X Whole Car Blast. First, remove the cabin filter and put the fan on high speed in recirculation mode with the AC off. Then, set off the can and close the doors and windows for 15 to 20 minutes. This will circulate the deodorizer throughout the whole cabin for a long-lasting clean and fresh scent. Turtle Wax Power Out! Odor-X Spray can be used in problem areas, like the trunk, cargo area, or air vents. Finally, install a new cabin filter.
auto detailing guide - turtle wax - interior detailing odor removal

REFRESH YOUR UPHOLSTERY

  • Next, clean the hard surfaces in your car, like plastic and vinyl dash and console pieces. If your interior is relatively clean, then you won’t need a strong cleaner. Turtle Wax Spray & Wipe Interior Detailer is a convenient way to quick-clean and protect hard surfaces in your car. For stubborn grime or stains, use a diluted organic or citrus cleanser.

Pro Tip: Spray your cleanser of choice on a microfiber cloth, then use the cloth to clean the surface. This prevents overspray and drips.

  • Now, let’s tackle some of the soft surfaces of your car detailing project. A foaming upholstery cleaner, like Turtle Wax POWER OUT! Upholstery Cleaner can be sprayed directly to cloth and synthetic headliners, door panels, and other porous surfaces. Allow to penetrate a couple minutes, then use a stiff brush to loosen dirt and grime from the surface.
  • Seats take a lot of abuse, from dirty clothes, sweat, pet stains, kid footprints, and food and drink spills. For light cleaning and deodorizing cloth seats, use Turtle Wax POWER OUT! Upholstery cleaner. Pretreat stains for five to ten minutes before cleaning the whole seat with a stiff brush. Heavy cleaning will require longer pretreat time and a steam cleaner can work wonders, here.
auto detailing guide - turtle wax - stiff brush upholstery

RENEW YOUR LEATHER SEATS

  • Leather seats require special care because soaps and chemicals will dry it out, leading to fading and cracking. For quick cleaning and protection, Turtle Wax POWER OUT! Leather cleans without harsh chemicals. The included soft brush can work out grime and stains. For stubborn grime or stains, a diluted citrus or organic cleanser can be used.

Pro Tip: Always clean from top to bottom, because loosened dust and dirt fall – gravity is great that way.

  • A wet-dry vacuum with automotive vacuum accessories will get all that dust and dirt out of the carpet. Be sure to move the front seats back and forth to get to every part of the carpet. If you’re mechanically-inclined, with a few hand tools, remove the seats, center console, and other trim pieces for better access to every corner of your carpet.

Pro Tip: Use a stiff brush to agitate the carpet just ahead of where you’re vacuuming to get even more dirt out of it.

auto detailing guide - turtle wax - power out! leather brush

SAVE YOUR GLASS FOR LAST

  • Once the carpet is clean of dust and dirt, it’s time for a carpet shampoo. Using Turtle Wax POWER OUT! Carpet & Mats Cleaner, thoroughly work one section at a time. Use the built-in brush or a stiff brush to agitate the cleaner and work it into the carpet. Then, use a wet-dry vacuum or steam cleaner to remove the foam and contaminants. Don’t forget to pop the trunk and apply the same treatment.
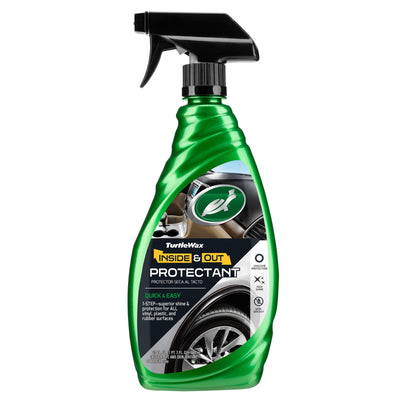
  • Once everything is clean, we move on to protection. Application of Turtle Wax Inside & Out Protectant protects interior hard surfaces, such as the dash and console, from future grime and stains. It also looks great, with just the right amount of shine. Apply with one microfiber cloth and buff out with a second one. Use leather conditioner on leather seats and upholstery to restore moisture and prevent fading and cracking.
  • We save the glass for last because it’s the most sensitive to other interior auto detailing operations. Using a non-ammonia glass cleaner and microfiber cloths, clean all exposed glass, such as the windshield, side windows, back window, and rear-view mirror. Wet one cloth with glass cleaner, for cleaning, using a second cloth to buff out any streaks. Don’t forget the sunroof instrument cluster lens and dome light lens.

Pro Tip: If your doors have upper window frames, roll the windows down a few inches and clean the top edge of the glass, first. Then, roll the windows up and clean the rest of the glass.

auto detailing guide - turtle wax - interior glass cleaning

EXTERIOR DETAILING SUPPLIES AND STEPS

Like interior detailing, exterior detailing involves a few more steps than simply washing and rinsing, but the results can be significantly better. Exterior auto detailing should be done out of direct sunlight to prevent water spotting and make everything easier to work with. Now that the interior detailing is done, pop the hood and fuel door and close the doors and windows.

START FROM TOP TO BOTTOM

  • Using a garden hose or pressure washer, thoroughly rinse the outside of your vehicle, starting from the top to the bottom. This starts loosening dirt and grime and bugs from your car so they can run off. A snow foam pre-wash is good to apply once the car is completely rinsed.
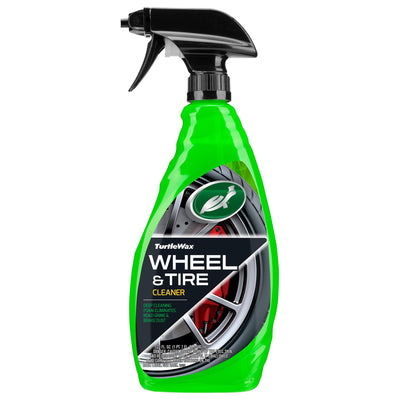
  • Clean the tires and wheels. Turtle Wax All Wheel & Tire Cleaner’s powerful foam formula sticks to tires and wheels, floating off brake dust and road grime without abrasives or harsh chemicals. Use tire and wheel brushes to work the foam into crevices.

Pro Tip: If you clean the wheels last, you might splash road grime to the body of a clean car.

auto detailing guide - turtle wax - tire shine

ENGINE BAY CARE

  • The engine bay is next, and your mechanic and your bank account will thank you. Clean engines run cooler, last longer, are more reliable and are easier to work on. If your engine has a distributor, cover it with a plastic bag. Rinse the engine bay and the underside of the hood with a pressure washer or garden hose, then soak with an undiluted organic or citrus degreaser. Open the fuel door and clean inside, as well. After five to ten minutes, rinse everything with water. Foaming cleansers stick better to grease and oil, helping dissolve them faster. 
    • Pro Tip: Warm up the engine a few minutes to help the degreaser work better.
  • Now we finally get to wash the car, using two buckets and a microfiber wash mitt. You might need a short stoolstep ladder, or long-handled soft brush to get to the top of your vehicle. Whatever you use, always use the two-bucket method, one with Turtle Wax MAX Power Car Wash and water, and the other with clear water. Before picking up more soapy water, always rinse in the clear-water bucket. Start with the roof, moving down to the glass, hood, trunk, doors, body, bumpers, and rocker panels. A soft brush is good for cleaning deeper into the grille. 
    • Pro Tip: Warm water, no hotter than 140 °F, helps the soap work better and is more comfortable to use. Do not let the soap dry on the vehicle – be generous!
auto detailing guide - turtle wax - tire clean

PROTECT YOUR PAINT

  • Use a garden hose or pressure washer to rinse your car, starting at the top. Now, it might be tempting to let your car air-dry, but this is an invitation for water spots. Use a chamois or microfiber cloths to dry your vehicle. Squeeze out the cloths often and switch to dry cloths for the final wipe-down. Open the doors and dry weather seals, especially if freezing temperatures are expected. Wipe down weather seals with Turtle Wax Trim Restorer to improve appearance and prevent cracking and sticking.
  • Even though your car is clean and dry now, don’t stop there – there are likely still contaminants on your paint and glass that are sticking around to ruin your image. Stuff like grease, bug splatter, brake dust, and water spots aren’t always easy to see, but their combined effect is poor paint appearance. Using detailing clay and clay lubricant – leftover soapy car wash is a good option – work the clay over your car. Work small sections at a time and knead the clay often. Use your fingers to feel where the paint is not as smooth (read: contaminated) and work these areas with the clay bar.

Pro Tip: Detailing clay also works great on wheels, glass, and chrome, too, but never use clay bar on rubber, plastic, or polycarbonate.

auto detailing guide - turtle wax - clay bar

ADD LAYERS OF PROTECTION

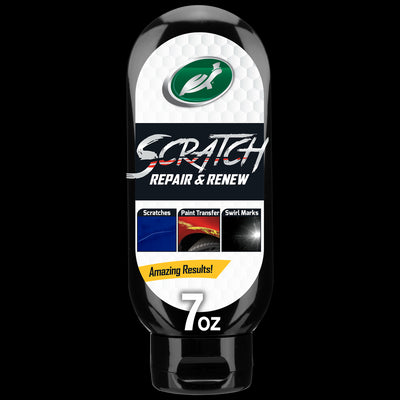
  • Addressing scratches and paint chips deserve their own article, but minor paint imperfections like these can easily be remedied when exterior detailing your car. Applied to a foam applicator, microfiber towel, or dual-action orbital polisher, Turtle Wax Scratch Repair and Renew can remove most light scratches and swirl marks in just a few minutes.
  • Whereas the clay bar removed any lingering contaminants, polishing your car will smooth out microscopic surface imperfections in the clear coat. Apply polishing compound to the foam pad on a dual-action orbital polisher and work over a small section of your vehicle at a time. Add more polishing compound as needed, buffing until everything has an even sheen. Verify by checking how different sections of paint reflect the lights.

Pro Tip: Use masking tape to protect plastic and rubber trim, emblems, headlights, and marker lights.

  • Now that the paint is smoother, we’ll add layers of protection. Turtle Wax Ice Spray Wax adds a waterproof coat to your paint job. Simply apply to a microfiber cloth and rub it into the paint. Use a second cloth to buff to a shine.
auto detailing guide - turtle wax - ice spray wax

SHINE & POLISH TO FINISH

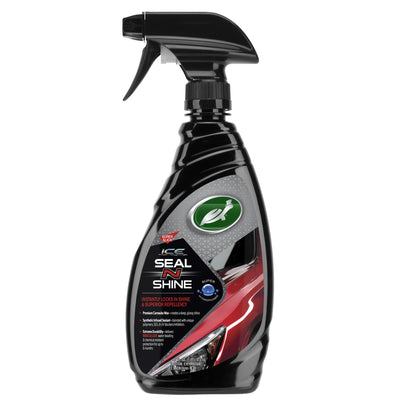
  • While the waxed surface is waterproof, a truly hydrophobic finish – water beads up and runs off – will improve shine and prevent most road grime from sticking to your paint. Turtle Wax Ice Seal N Shine goes on easy with a microfiber cloth and lasts for months.
  • By this time, the tires should be dry. Spray them with Turtle Wax Wet’N Black Ultra Wet Tire Shine – wipe with a cloth for a more matte finish. This leaves a nice finish, protecting your tires from sun damage and slowing down dry rot. Your tires will also stay cleaner, longer.
  • Finally, as with the interior, glass comes last. Using non-ammonia glass cleaner and microfiber cloths, clean all exposed glass and polycarbonate. Moisten one cloth with glass cleaner to clean, using a second cloth to buff out any streaks. Start with the sunroof glass, moving to the windshield, side windows, side mirrors, and rear window. Then, clean the headlight, fog light, and taillight lenses.

The first time your detail your car at home, it might seem like a lot of steps. As with all things, detailing your car quickly and efficiently takes practice. Once you see, feel, and smell the results of a freshly detailed car, though, it’ll have been a worthwhile experience.

auto detailing guide - turtle wax - ice seal & shine

FAQ

  • Why should I detail my car?
    While a car wash is about basic cleaning, auto detailing is about long-lasting protection. A detailed car looks better, smells better, and lasts longer.
  • How long does it take to detail my car?
    First-time car detailing might take two to eight hours, but subsequent details should take less than two hours.
  • How often should I detail my car?
    A full auto detail might be considered once a year, with touchups every couple of months. Wax and paint sealant, for example, only tend to last a couple of months.
  • What supplies do you need to detail a car?
    Car-specific supplies are always recommended because they are made for cars. Dish soap or laundry detergent can affect automotive finishes and materials adversely.
  • Is hot water bad for car paint?
    Hot water improves car wash soap’s ability to cut through grime. Professionals find water between 100 °F and 140 °F works best, but hotter can damage your car paint.
  • Why should I wax my car?
    Car wax is a protective coating that improves shine and prevents sticking of water, bugs, and road grime. Car wax usually only lasts a couple of months, requiring reapplication to restore shine and paint protection.
  • Why should I polish my car paint?
    The car polishing compound is essentially an ultrafine abrasive. Worked with a dual-action orbital polisher, polishing your car paint refines the surface of the clear coat so the underlying paint color shines through clearly.
  • Can polishing remove scratches on my car?
    Depending on the severity of the scratch, you may need a different grade of abrasive to remove it. Swirls and holograms are just clearcoat deep and can be smoothed with a car polishing compound. Scratches through the paint layer will need wet-sanding, touchup paint, and a clear coat to restore the original finish.

Related Articles

WANT MORE TURTLE WAX?

Subscribe for your newsletter and the rewards will be in your inbox before you even get there

Latest

News, events and insights from Turtle Wax® worldwide

Offers

Exclusive offers and discounts on Turtle Wax® products

Rewards

Regular treats and surprises for all subscribers

Thanks! You should receive a confirmation email shortly.